Using OIDC to Secure GitHub Actions Access to AWS
Author: Mohan Drey G. Tampon
Last Updated At: 2026-01-07
The Problem with Traditional CI/CD Authentication
Traditional CI/CD pipelines often depend on long-lived AWS access keys stored as GitHub secrets, creating security risks such as credential leakage, difficult rotation, and limited auditability. GitHub Actions’ support for OpenID Connect (OIDC) eliminates the need for static credentials by enabling short-lived, automatically rotated access to AWS. This approach significantly improves security, enhances traceability, and aligns CI/CD workflows with modern zero-trust best practices.
Security Challenges with Long-Lived Access Keys
- Static credentials stored in GitHub secrets, increasing the attack surface
- High risk of credential exposure if secrets are leaked or compromised
- Manual rotation required to meet security and compliance requirements
- Overly broad permissions often granted for convenience rather than necessity
- Limited traceability, with no clear record of which workflow or job used the credentials
The OIDC-Based Solution
- No credentials stored in GitHub — authentication is handled dynamically
- Short-lived, automatically expiring tokens, eliminating long-term risk
- Fine-grained permissions scoped to specific repositories, branches, or environments
- Comprehensive auditability of all AWS API actions via native AWS logs
- Enforcement of the principle of least privilege by design
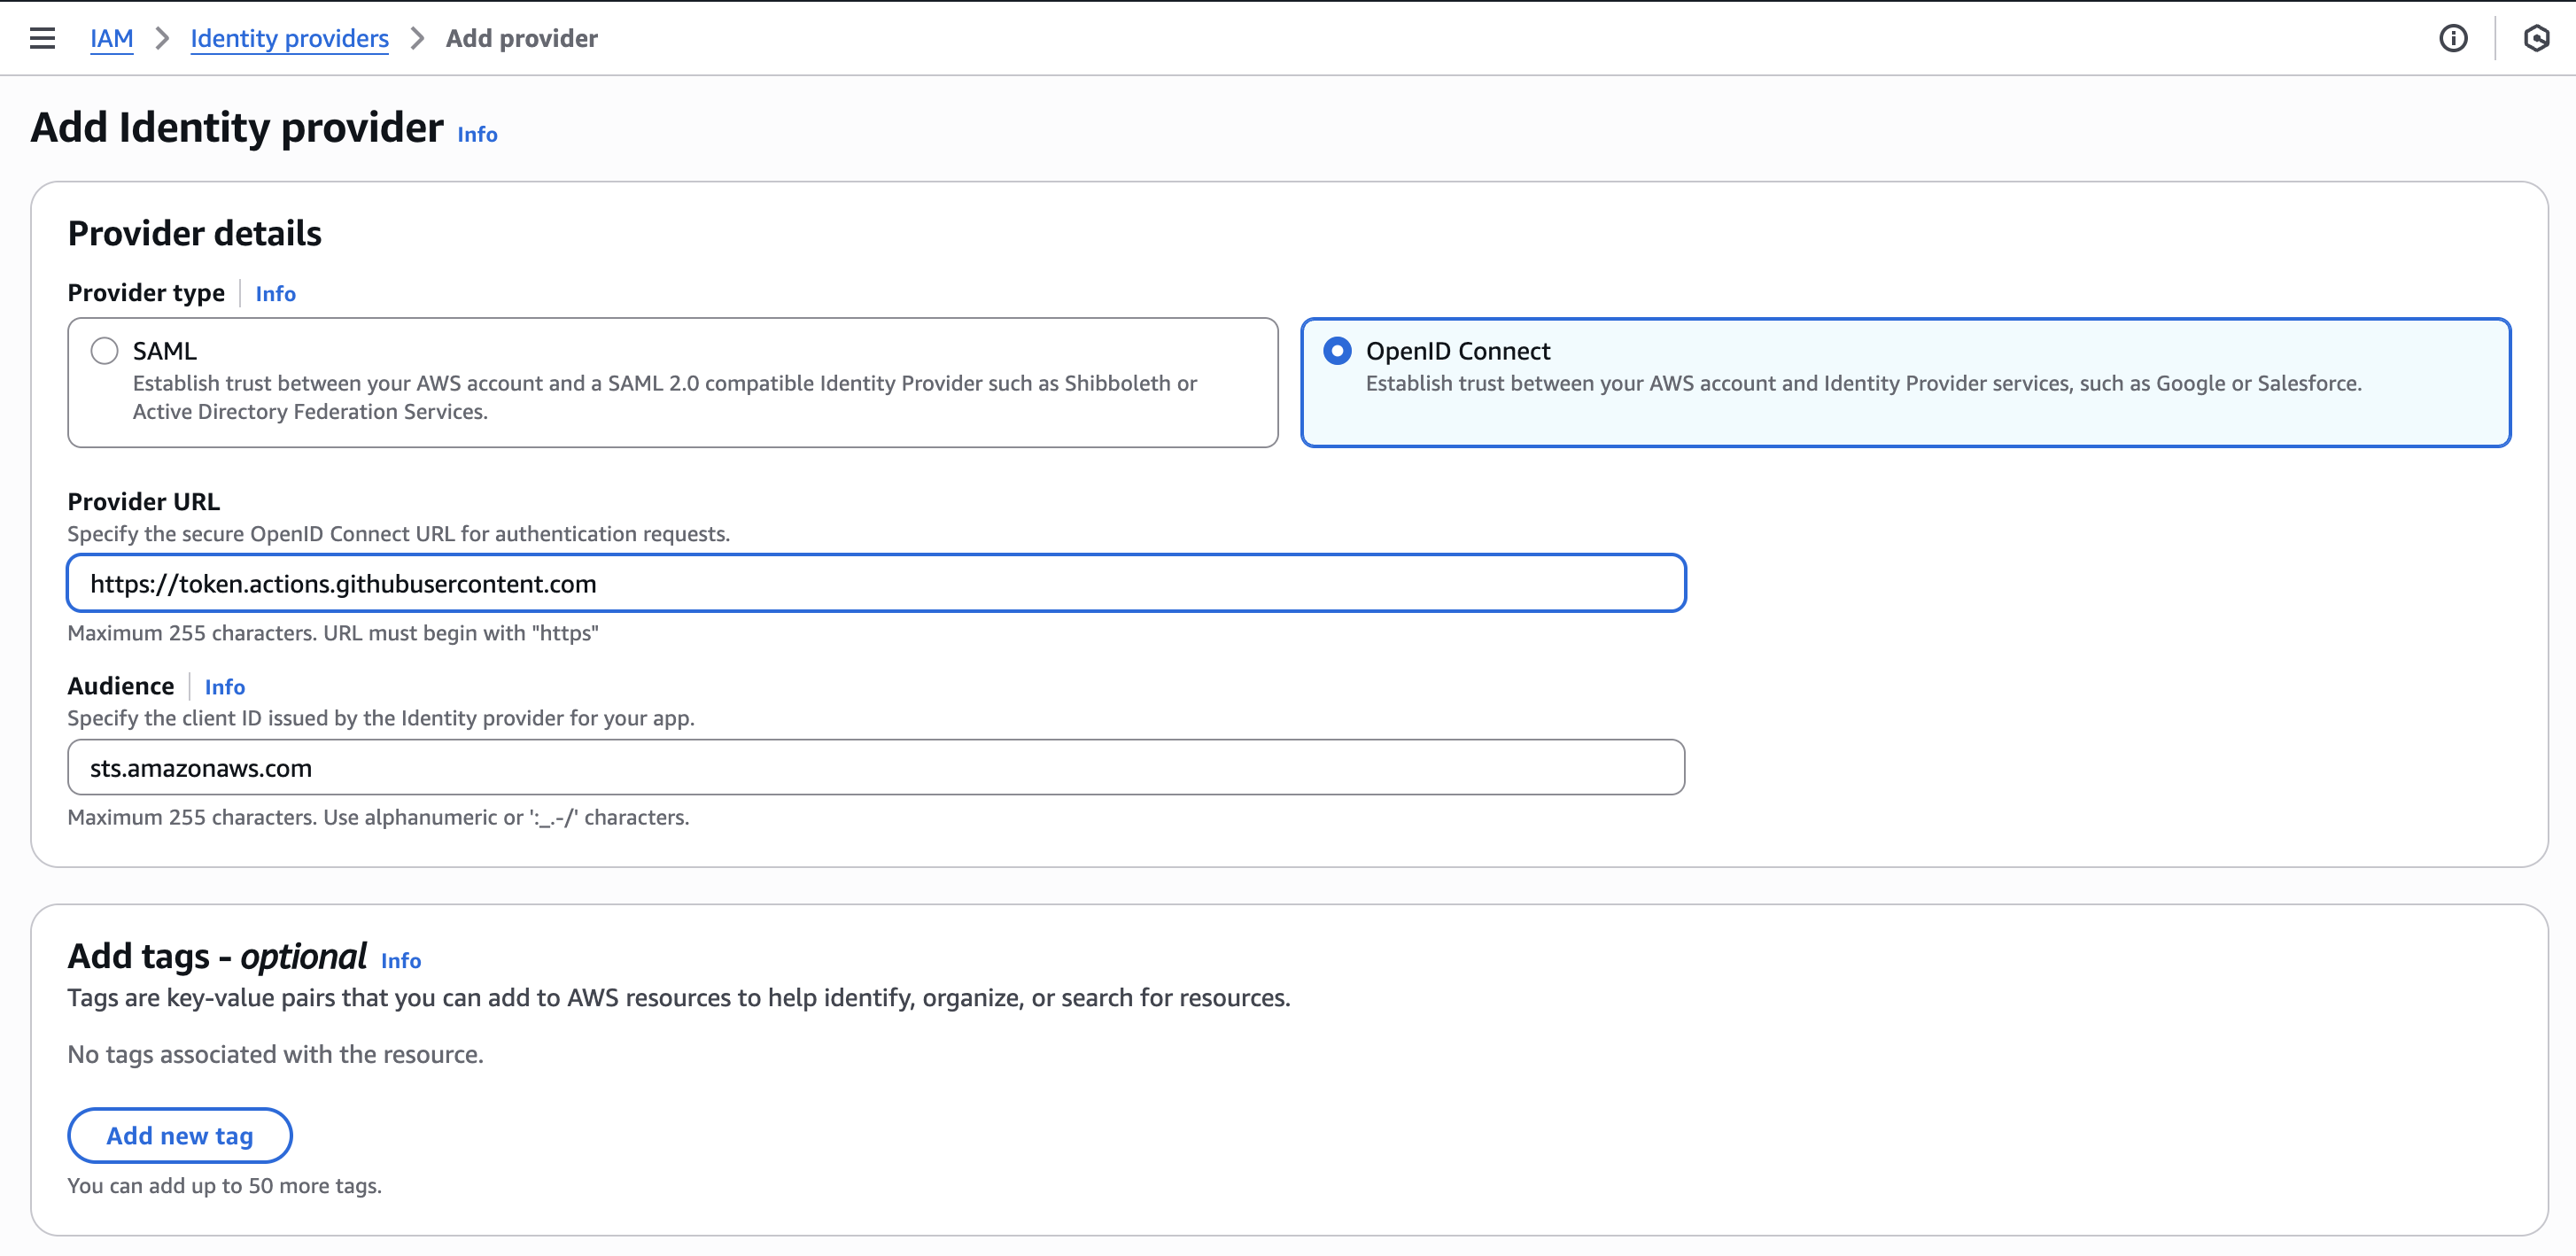
Step 1: Create an Identity Provider
- Sign in to the AWS Management Console and open the IAM service.
- In the left-hand navigation, click Identity providers.
- Choose Add provider.
- For Provider type, select OpenID Connect.
- For Provider URL, enter:
https://token.actions.githubusercontent.com - For Audience, enter:
sts.amazonaws.com
Step 2: Assign a Role
Once the OIDC provider is created, click Assign role then Create new role to configure access.

Click Next to proceed.
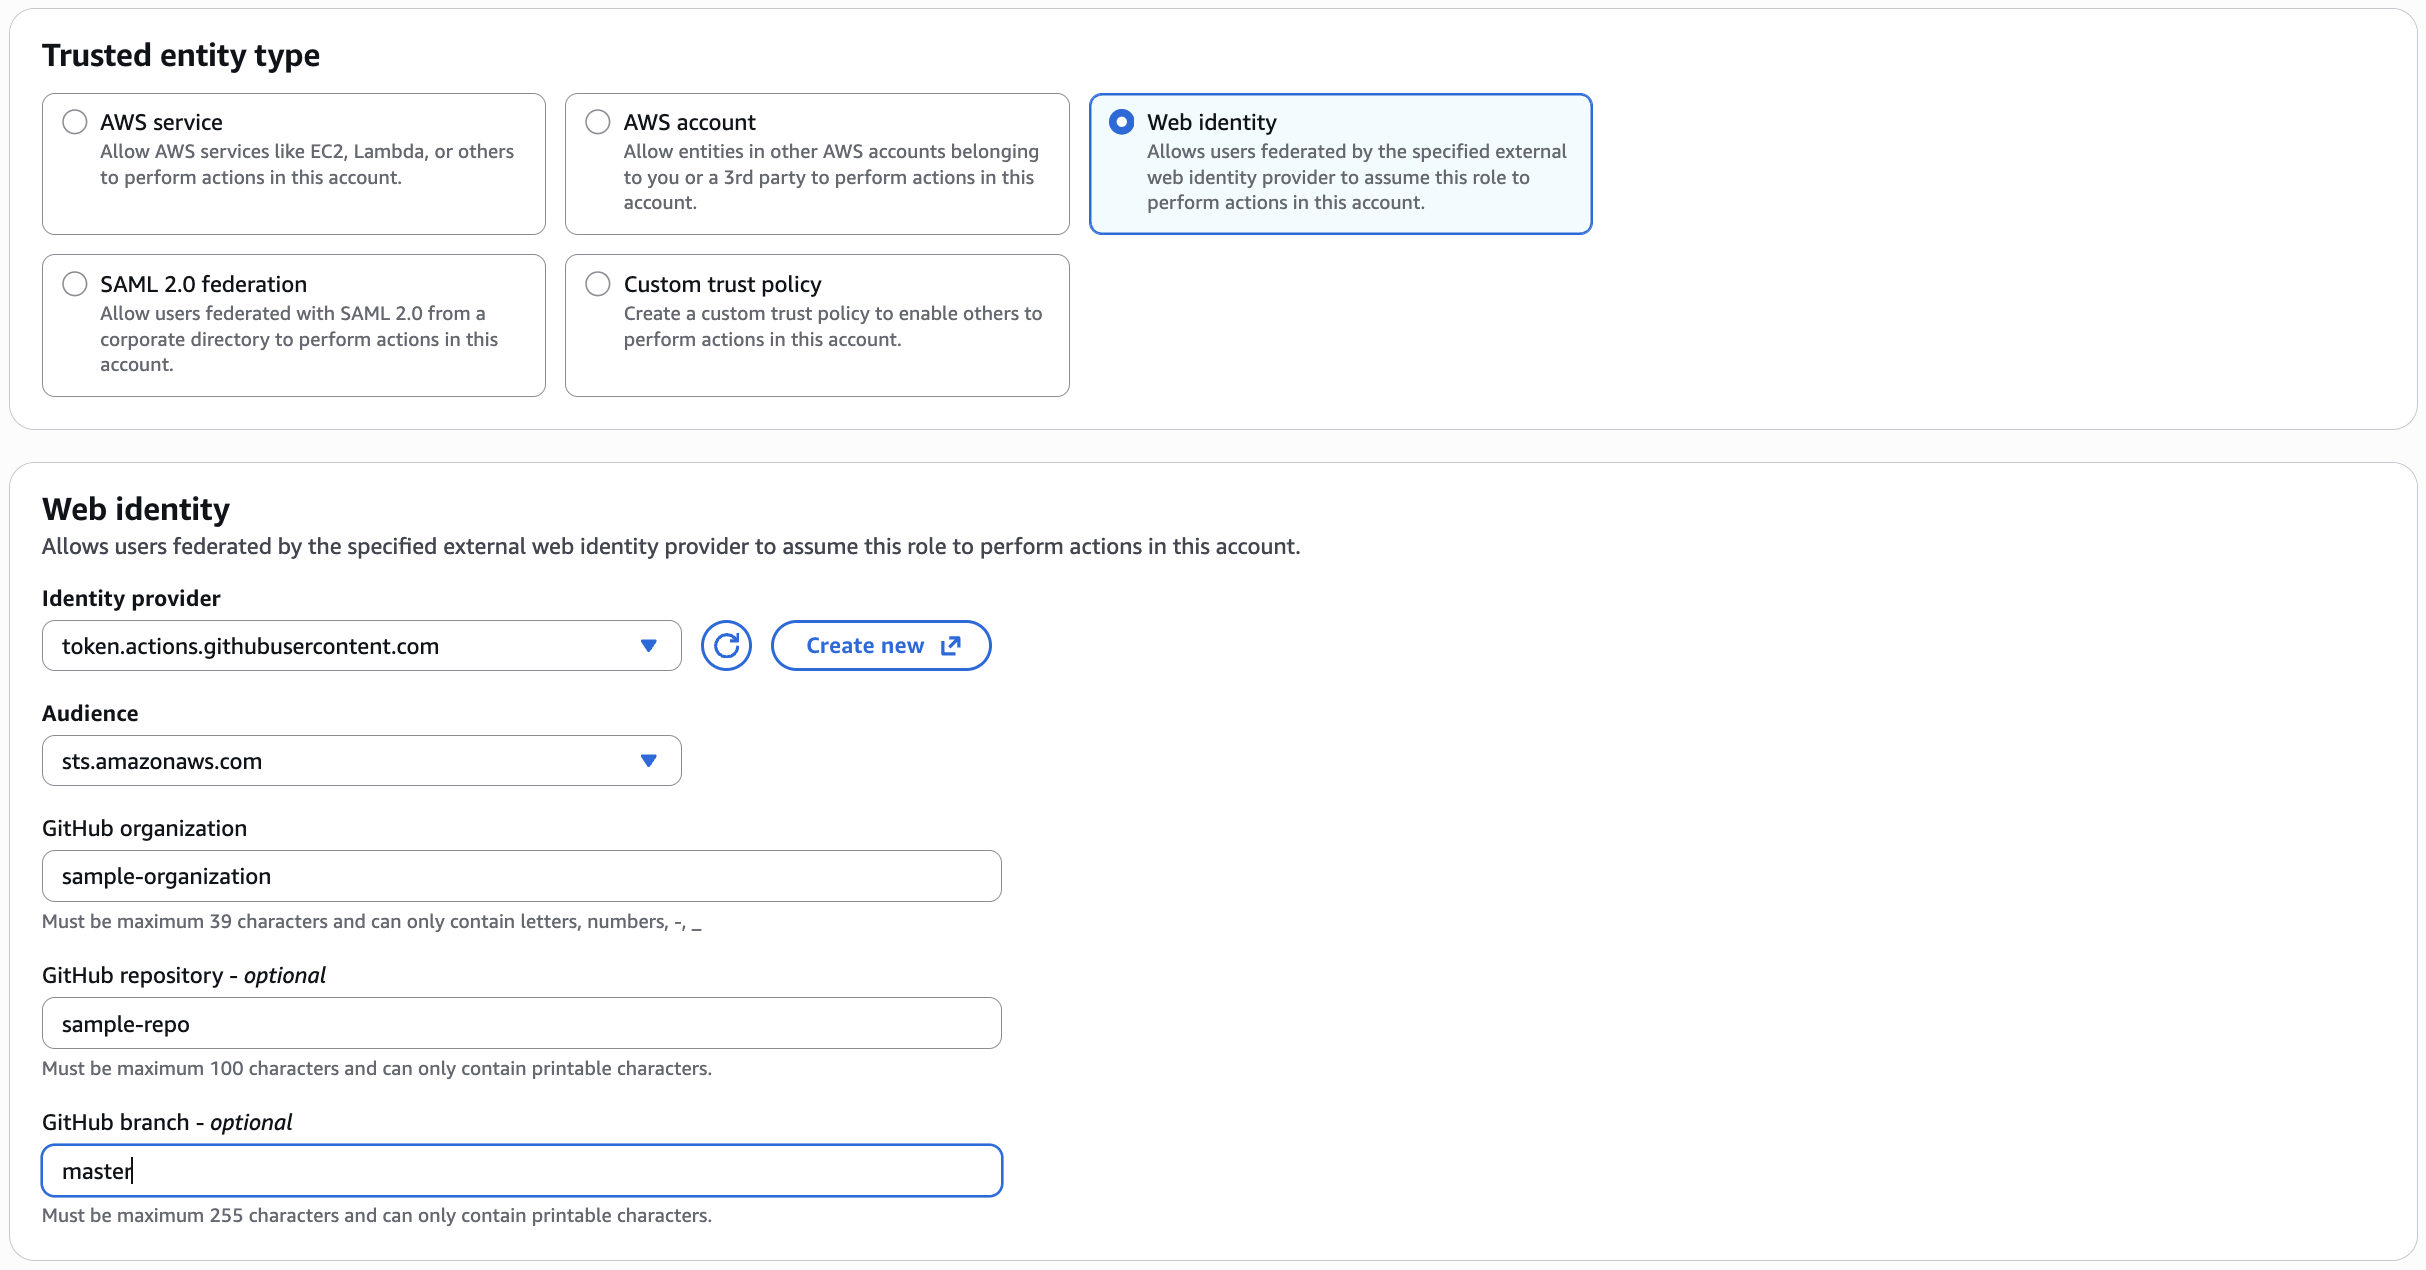
Step 3: Configure a Web Identity Trust
- On the Trusted entity type page, select Web identity.
- For Identity provider and Audience, choose the provider you created in the previous step.
- Github organization: Enter the name of the GitHub organization that owns the repository.
- Github repository (optional): Specify the repository that runs the GitHub Actions workflows.
-
Github branch (optional): Enter the branch that is allowed to trigger the GitHub Actions workflows.
-
Double check then click on Next.
Add Permissions
Tip
For better security and least privilege, it’s recommended to create a custom IAM permission policy tailored to your use case. However for this tutorial, we’ll use an existing managed policy for ease of use.
-
Select an existing permission policy that fits your use case. For this tutorial, choose
AmazonS3FullAccess.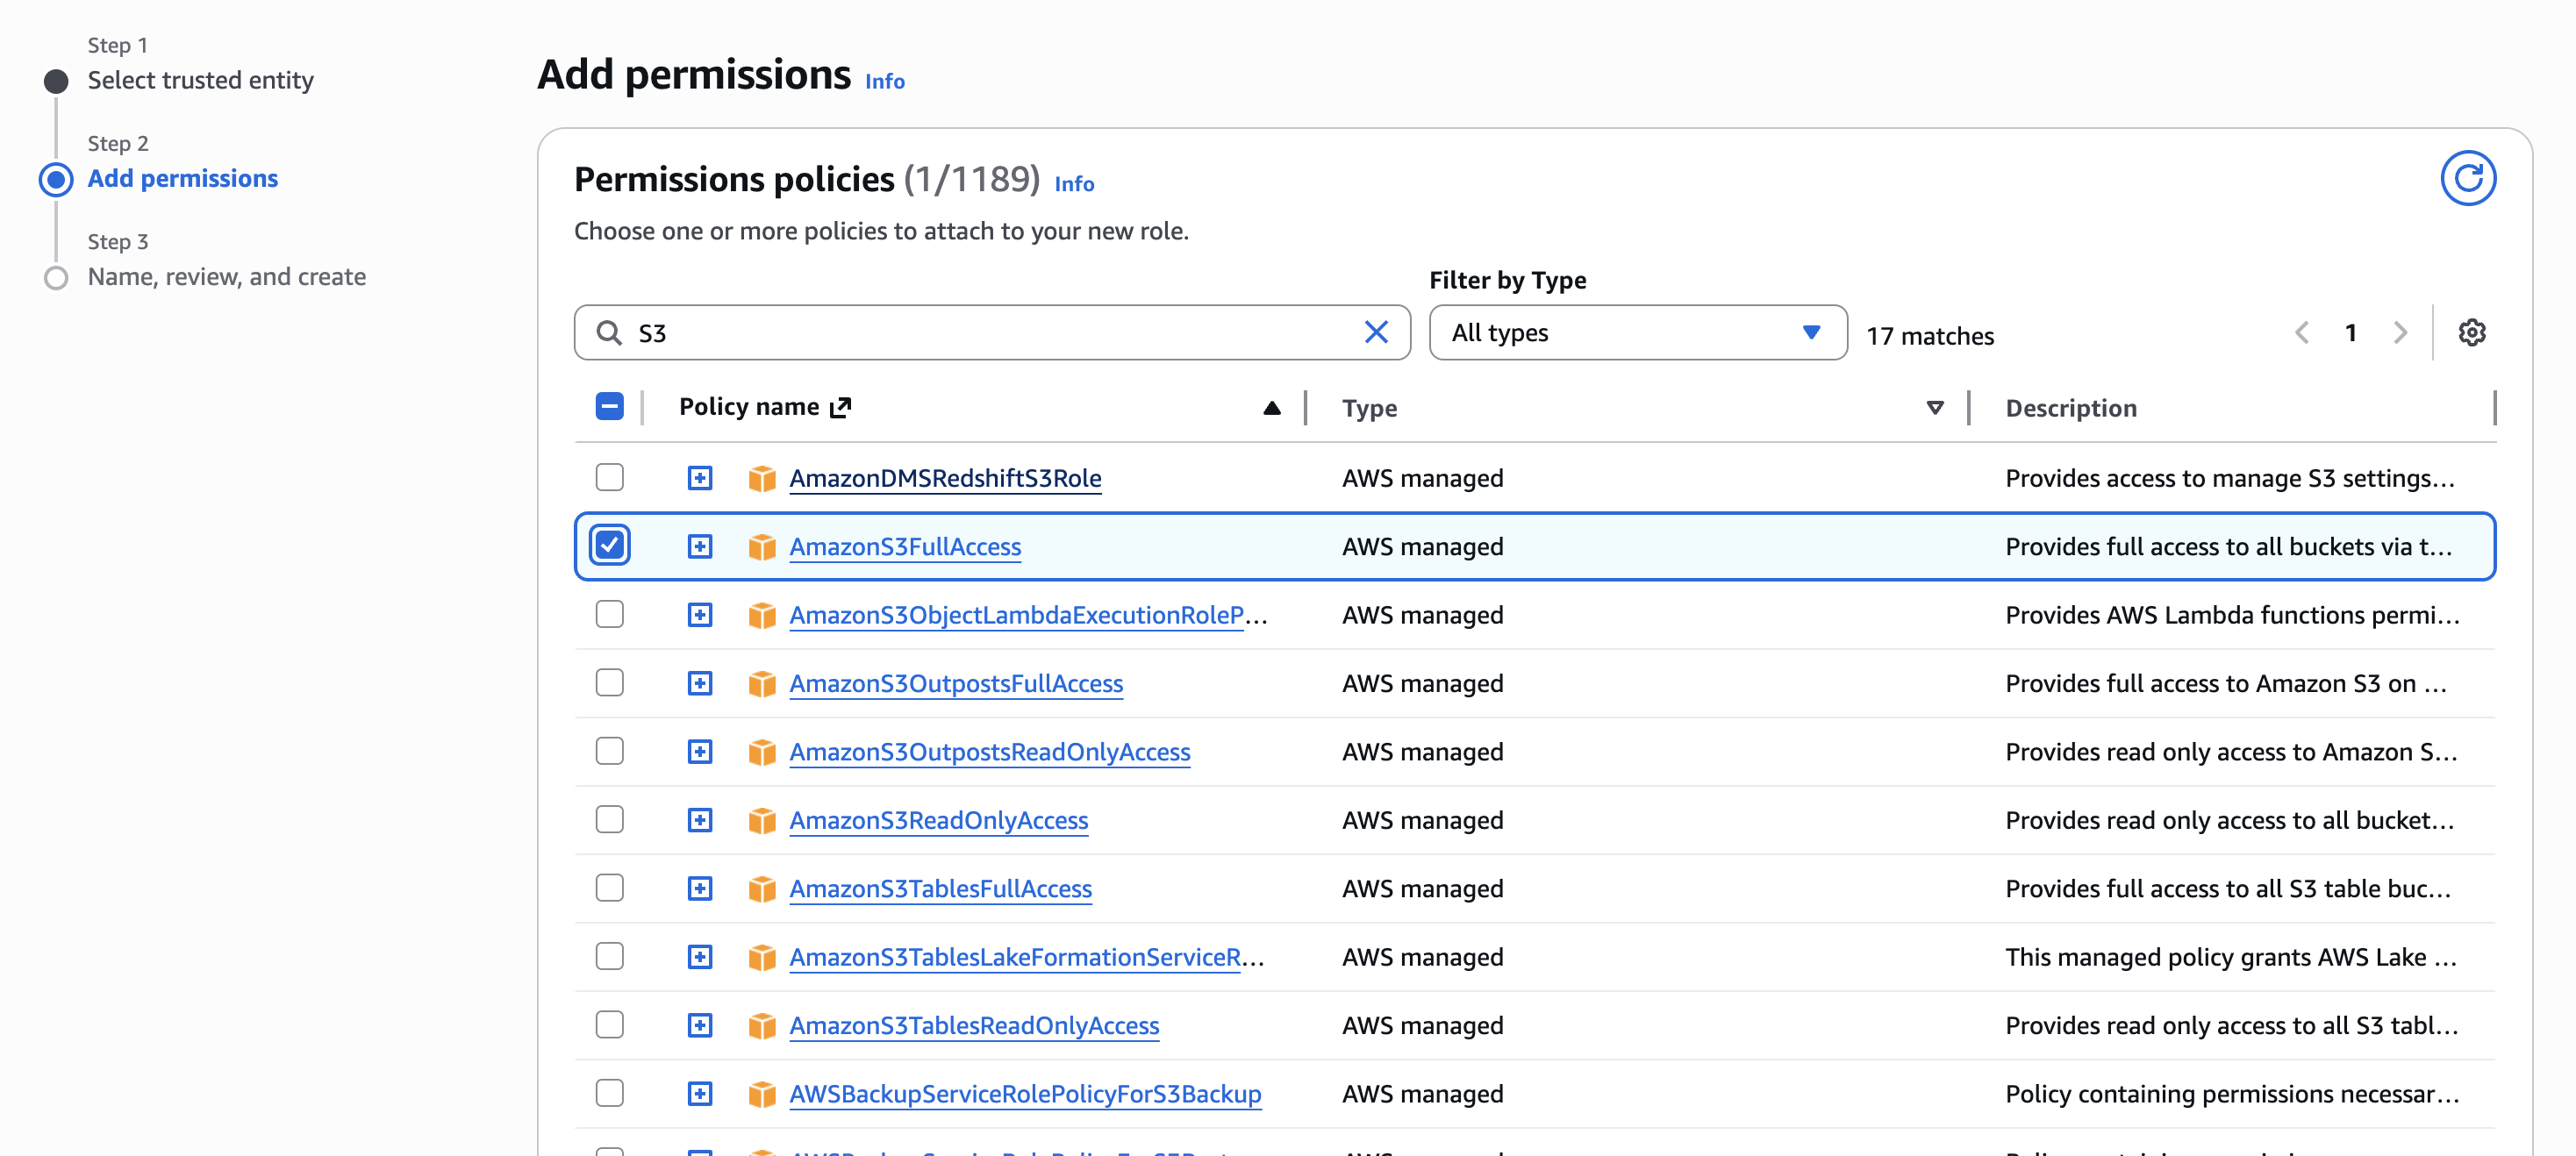
-
Set permissions boundary (optional): Leave this set to the default.
- Click Next to continue.
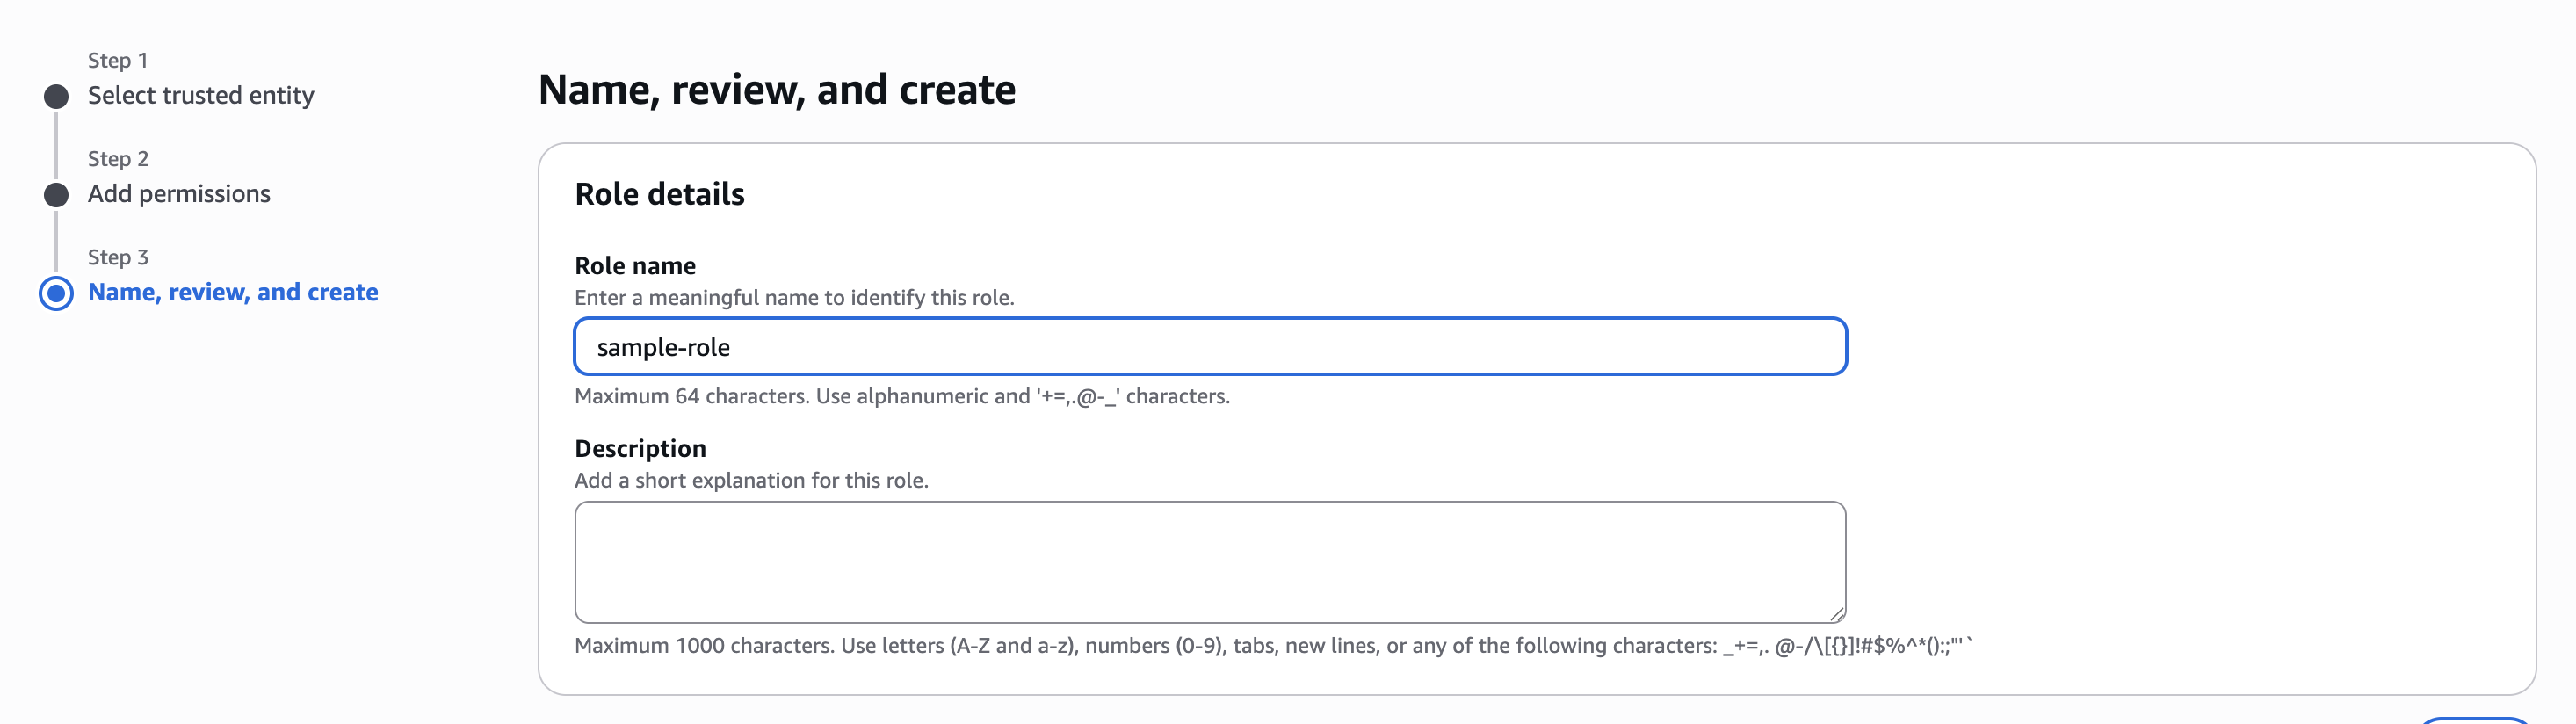
Name and Review Role
-
Provide a clear and descriptive Role Name and Description.
-
Review the Trust policy and ensure the conditions align with your security requirements.
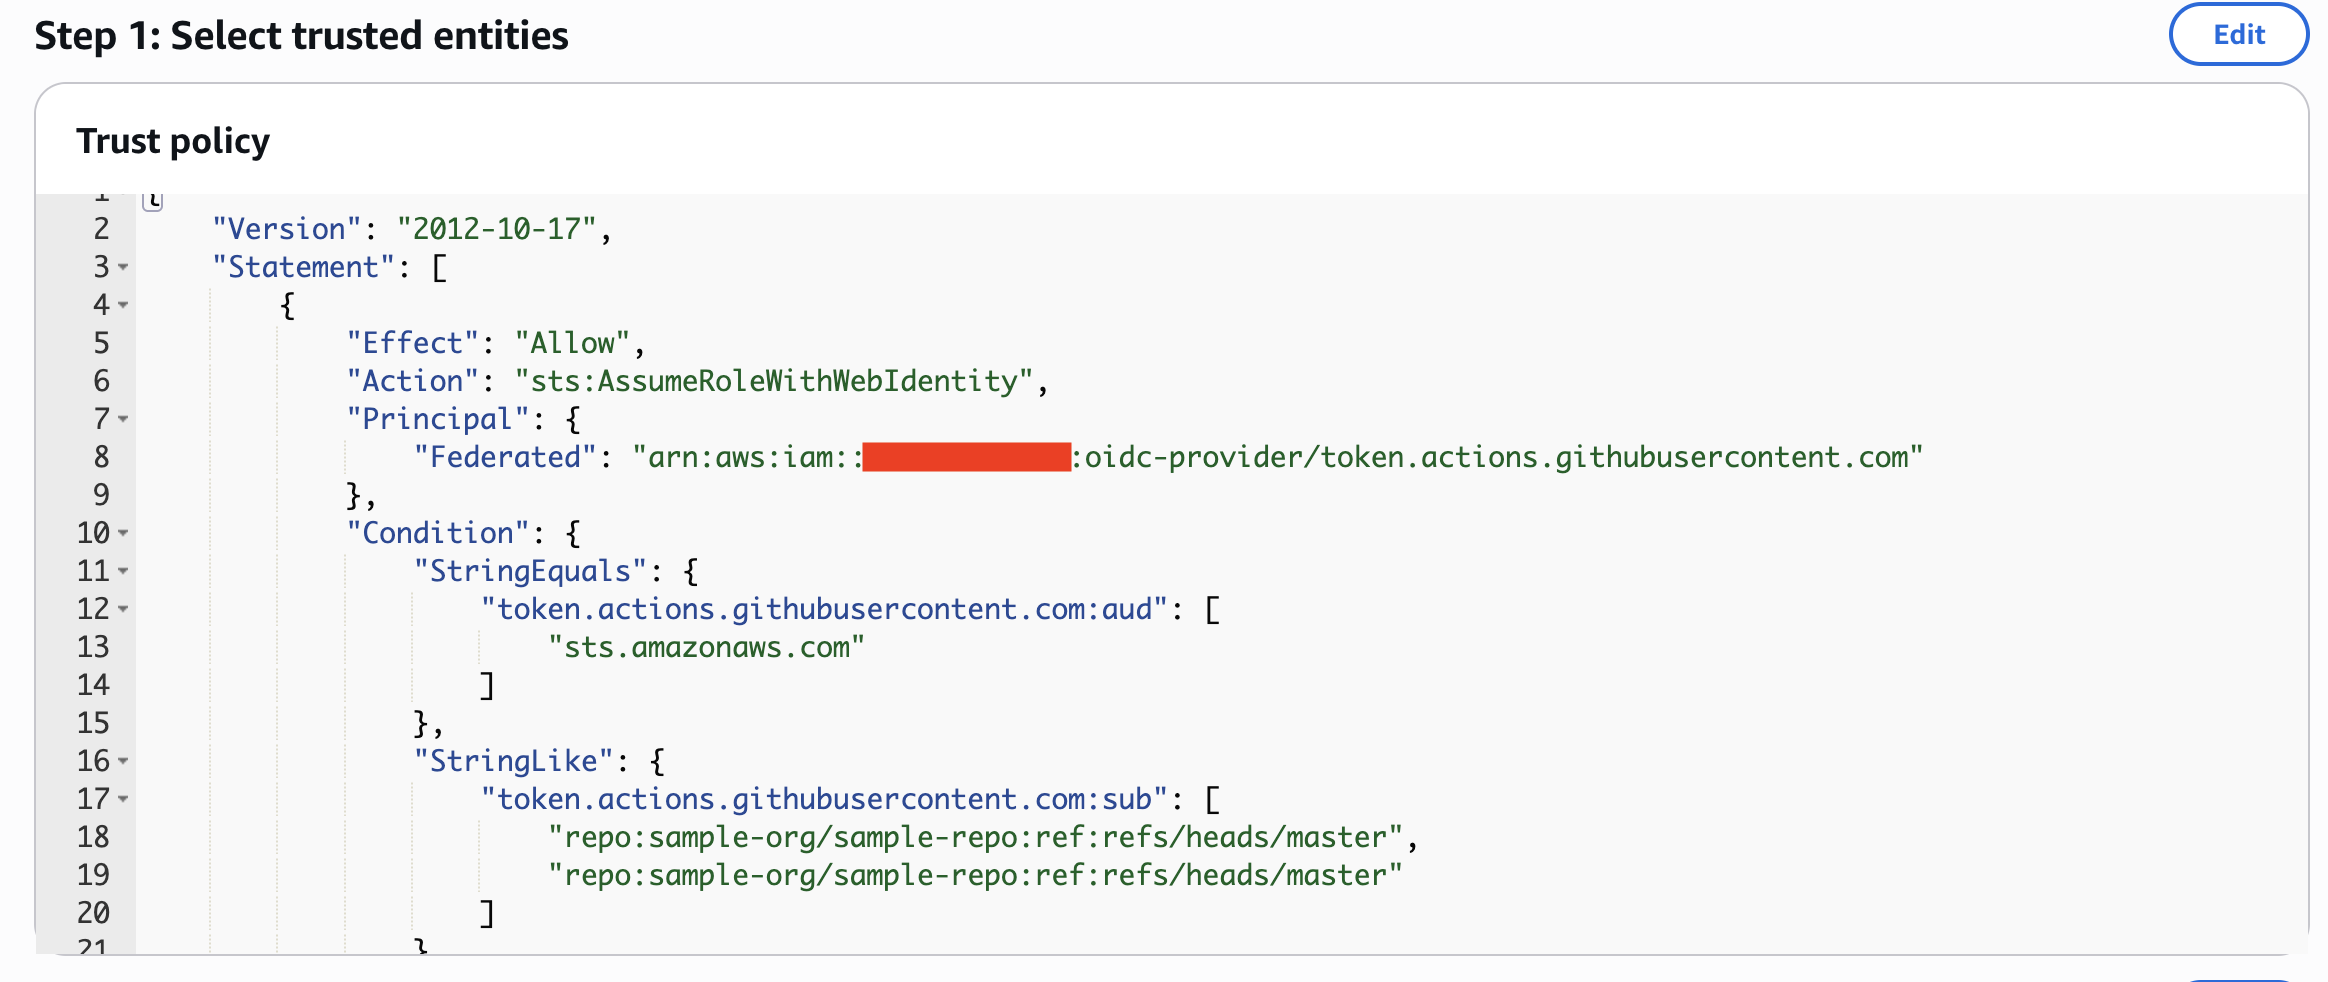
The trust policy above enforces the following restrictions:
-
Only GitHub Actions workflows from the
sample-org/sample-reporepository can assume this role. -
The workflow must run on the
masterbranch. -
Only OIDC tokens with the audience set to
sts.amazonaws.comare accepted.
These conditions ensure that role assumption is tightly scoped and follows security best practices.
-
-
Verify the attached Permissions and review Tags (useful for cost allocation and monitoring).
- Click Create role when everything looks correct.
Step 4: Create Github Actions Workflow using OIDC Authentication
Create a file .github/workflows/upload-to-s3.yml and copy the code below.
name: Upload files to S3
on:
  push:
    branches:
      - main
  workflow_dispatch:

# OIDC permissions for keyless authentication
permissions:
  id-token: write
  contents: read

jobs:
  upload:
    runs-on: ubuntu-latest

    steps:
    - name: Checkout repository
      uses: actions/checkout@v4

     # OIDC/IRSA Authentication - No more access keys needed!
    - name: Configure AWS credentials via OIDC
      uses: aws-actions/configure-aws-credentials@v4
      with:
        role-to-assume: "arn:aws:iam::12345678901:role/sample-role"
        audience: sts.amazonaws.com
        aws-region: "ap-southeast-1"

    - name: Upload all files to s3
        run: |
          aws s3 sync . s3://sample-bucket/ \
            --delete \
            --exclude ".git/*" \
            --exclude ".github/*" \
            --exclude "README.md"
Note
Add the IAM Role ARN, bucket name and AWS region to GitHub Secrets or Variables rather than hard-coding them.
Troubleshooting Common OIDC Issues in GitHub Actions
“Incorrect token audience” Error
-
Cause: The audience value in the AWS IAM trust policy does not match the token issued by GitHub.
-
Solution: Ensure the audience is set exactly to:
sts.amazonaws.com
Tip
Even a trailing period or extra whitespace will cause this error.
“Not authorized to assume role” Error
-
Cause: The trust policy’s sub (subject) condition is too restrictive or incorrectly defined.
-
Solution: Verify that the repository name, organization, and branch (or environment) in the trust policy exactly match the GitHub Actions workflow context.
“OIDC provider not found” Error
-
Cause: The GitHub OIDC provider has not been created in AWS IAM, or the provider ARN is incorrect.
-
Solution: Confirm that the OIDC provider exists in IAM and that the trust policy references the correct ARN.
Workflow Permissions Error
-
Cause: The workflow does not have permission to request an OIDC token.
-
Solution: Add the required permissions to your workflow: